


How Can We Help?
How do I migrate my email to cPanel?
How to transfer email to your new cPanel system
Note Well:
Things have changed on the ‘net since the first e-mail was sent back in 1971. The larger players have greater capacity to ensure delivery and fend off unwanted spam and phishing scams, therefore you may want to consider migrating to office 365 or g-suite at this time. That being said we’re happy to continue to server your email needs.
We highly recommend having an IT professional assist you with mail migration, but if you’ve got the tech savvy chops needed, just follow the easy steps below:
0. log into the legacy system and delete any mail accounts you no longer need: http://postmaster.purplecat.net
1. log into your cPanel account for your domain on our servers and setup all your existing email accounts: ([yourdomain.com]/cpanel)
2. verify that you can connect to both servers via webmail:
webmail.purplecat.net for our legacy server at mx1.purplecat.net
[yourdomain.com]/webmail for your new mail server managed through cPanel
or your mail client:
imap.purplecat.net for the legacy server, mail.[yourdomain.com] for the new mail server you can now manage via cPanel
3. Notify us to update your DNS so that mail starts flowing directly to the new servers. Your domain will be removed from the legacy mail server after one business day.
4. Migrate any mail you want to keep from the legacy server by configuring your mail client to connect to both servers simultaneously (your former server at imap.purplecat.net and your new mail server at mail.[yourdomain.com] and dragging/dropping your former mail messages/folders into the new server. This process varies widely depending on your particular mail client, ask your desktop IT support provider for assistance with this if needed).
5. **CRITICAL FINAL STEP**
NOTIFY US if you are not able to completed synchronizing your mail between the legacy and new servers within 24 hours of changing the DNS so we can help insure you don’t lose any critical mail you need to keep on the legacy system. Mail residing on the legacy server will be removed within one business day unless we hear from you otherwise.
Note that, ‘[yourdomain.com]’ should be replaced with the domain name on which you receive mail.
The new mail server you will be connecting to will be the ‘mail’ subdomain of your primary domain.
SMTP server: mail.[yourdomain.com]
IMAP server: mail.[yourdomain.com]
So if your domain name is:
example.com
Your mail server would be:
mail.example.com
Other handy links:
[yourdomain.com]/cpanel (let us know if you don’t have your cpanel username, then keep it in a safe place for future reference).
[yourdomain.com]/webmail (for checking your mail without using mail client software on your device/computer).
See below for details on using the cPanel interface and help setting up your mail client software.
Extra detailed information should you need it:
Creating your email account in cPanel
To get started, if you haven’t already, create your email account(s) in cPanel.
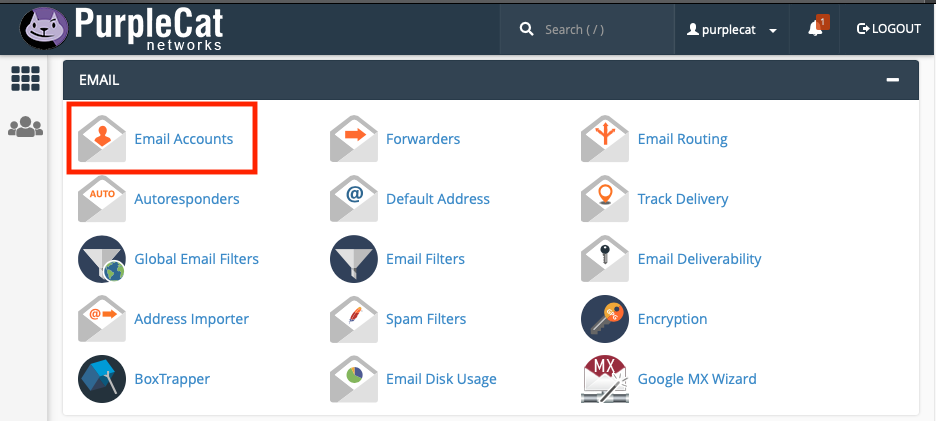
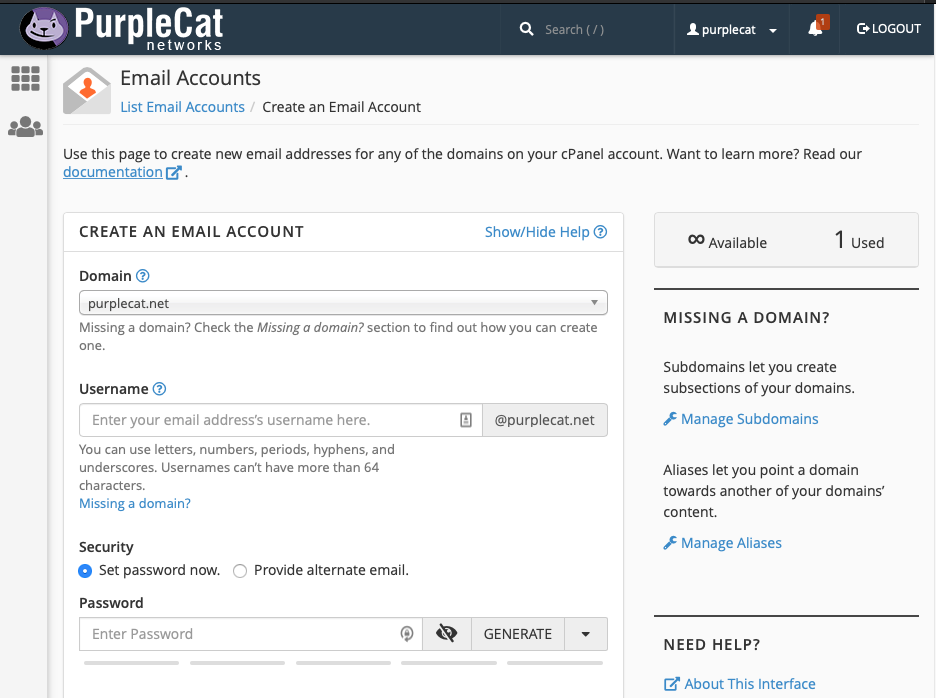
Select Email Accounts, then complete the form to set up the new account.
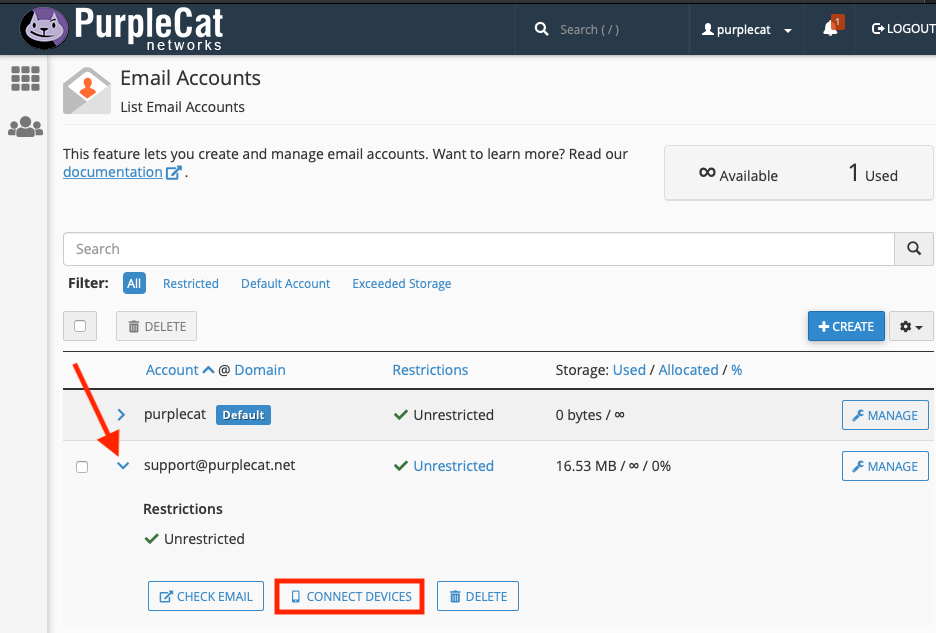
Once the account has been successfully created, scroll down the page to the Email Accounts section. Select Connect Devices to retrieve the configuration details needed to set up the account in your email application.
Open your email application and set up your new account. Do not delete your existing email accounts at this point.
Important: configure this new account as an IMAP over SSL/TLS account. Manually migrating your email between hosts will be easier on a desktop computer rather than a mobile device.
Optional: You may also use the “Mail Client Automatic Configuration Scripts” to allow cPanel to automatically configure your mail client with your email account.
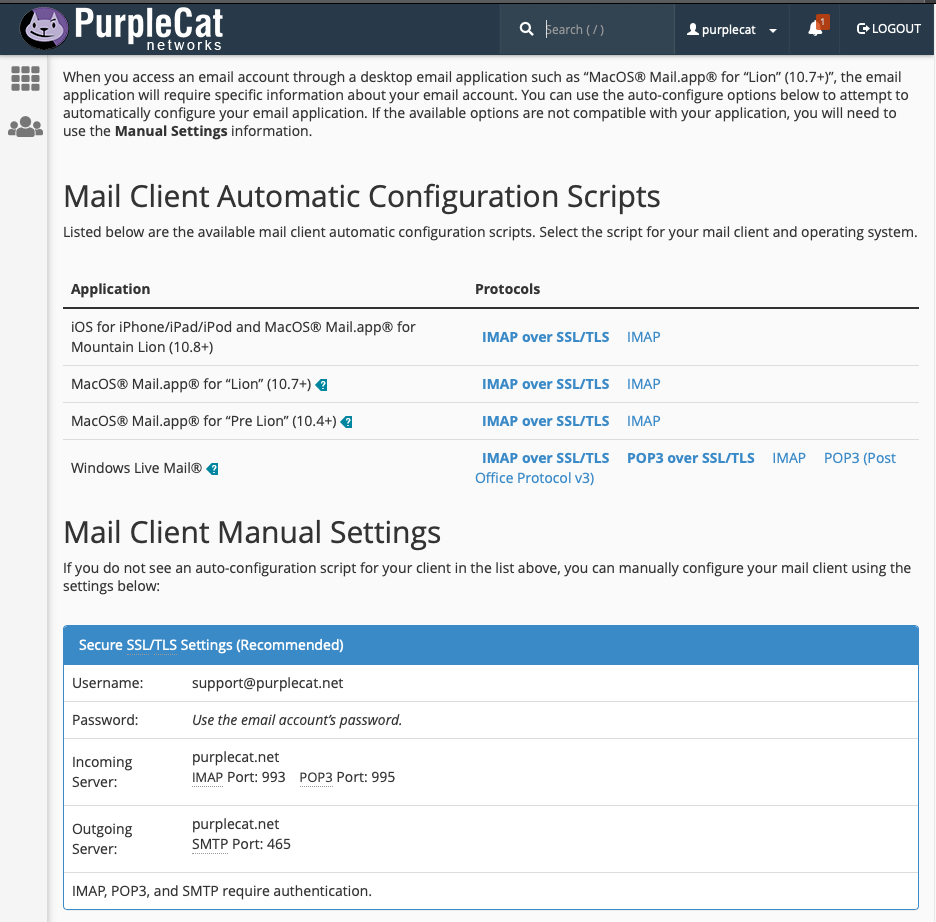
Username:	myemail@example.com
Password:	Use your email password.
Incoming Server:	mail.example.com
IMAP Port: 993
Outgoing Server:	mail.example.com
SMTP Port: 465
IMAP and SMTP require authentication.
Once complete, you should have email accounts configured for both your old host and the new cPanel email account you have just set up. Both should be visible in the left pane of your email application. In this example, we’re using Outlook to illustrate the configuration steps.
Transferring your emails between accounts
Your DNS MX records will need be updated to the following: 10 mail.example.com. (replacing example.com with your actual domain name).
Once both accounts are setup, you should see them in your email client window. One of them should have all your existing emails (old email account) and the other one should be empty (new email account).
You are now ready for actual email transfer:
![]()
Email transfer from the old server to the new one
In order to transfer emails, select them in old account and drag-n-drop them to the new account folder:
![]()
Once all tasks are completed transfer is considered to be finished.
You can move single/multiple emails or even subfolders from one server to another at the same time.
If you select Move, your emails will be deleted from your old account during transfer. Copy retains the email in each mailbox.